I’m not going to lie to you. When I bought my first hunting eBike, I treated it like a truck and tried to haul everything out of the box on day one. Didn’t go well. The bike came with basically nothing useful for hunting, and I spent that first November learning the hard way which accessories matter and which ones are a waste of money.
Four seasons later, I’ve worn out two sets of tires, broken at least three mounts, and hauled more whitetail bucks out of the timber than I can count. Here’s what I actually use and what I’d skip if I could do it over.
First Things First: Mount Your Weapon
You cannot ride a bike and carry a rifle at the same time. I don’t care how coordinated you think you are. A handlebar gun rack was the very first thing I bolted on, and it’s still the accessory I’d tell any new eBike hunter to buy before anything else. Padded clamps, quick release, keeps your hands free. Around $40 to $80 depending on the brand, and worth every cent. I’ve had good luck with the ones from eBike Generation.
Now, if you’re pushing through thick timber or cattails, a frame-mounted gun scabbard might be smarter. It sits low and diagonal along the frame tube, so branches slide over it instead of catching. It also lowers your center of gravity, which honestly makes the bike handle better on sidehills. I run a scabbard during late-season pheasant pushes when I’m going through nasty cover. The first one I tried was a cheap universal model I found online for about $35. It fit poorly and the velcro straps worked themselves loose over bumps. My shotgun slid out and hit the ground. Thankfully no damage to the gun or the optic, but I learned my lesson. Spend the $60 to $100 on one designed for eBike frames and you won’t have that problem.
Bowhunters, listen up. Don’t try to rig your compound onto a gun rack. It doesn’t work. The cams catch on everything and you’ll scratch your riser. Get a dedicated bow holder that cradles it without putting pressure on the limbs. Thirty to sixty bucks and it’ll save you a headache. Some fold flat when you don’t need them, which is a nice touch.
Hauling Gear (and Hauling Game)
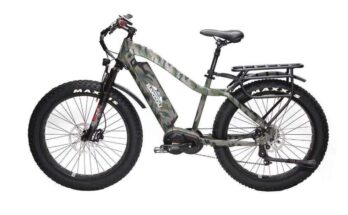
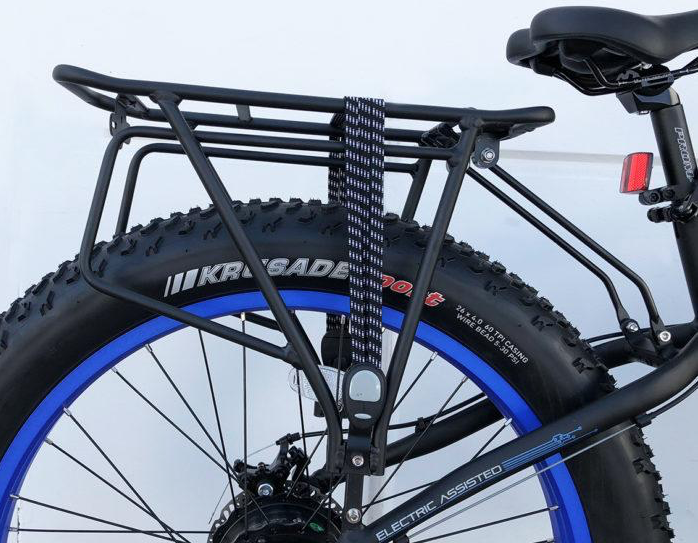
If your bike didn’t come with a rear cargo rack, stop reading this and go order one. Seriously. Nothing else works without it. Make sure whatever you get is rated for at least 50 pounds and that it’s compatible with your specific frame. I’ve seen guys overload cheap aluminum racks and crack them on a field road. Not pretty. eBike Generation carries racks that fit most popular hunting eBike models, and they can help you match one to your bike if you’re not sure. Budget $30 to $80 depending on materials and weight rating.
Here’s my unpopular opinion: the single best hunting accessory for any eBike is a $5 plastic milk crate from Tractor Supply, zip-tied to the rear rack. I’ve been using the same beat-up crate for three years. Calls, ammo, water bottles, gloves, rangefinder, snacks. Everything goes in the crate and you just reach back and grab what you need. Drill some holes in the bottom so rain drains out. People overthink this stuff.
A front basket or rack and a set of bungee cords or a cargo net round out the basic hauling setup. I keep a jacket and my lunch up front, and I always have three or four different-length bungees balled up in the crate for odd-shaped stuff. Maybe $50 total for both. You’ll use them every ride.
The Game Trailer Question
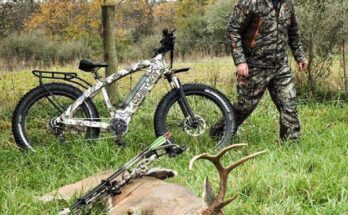
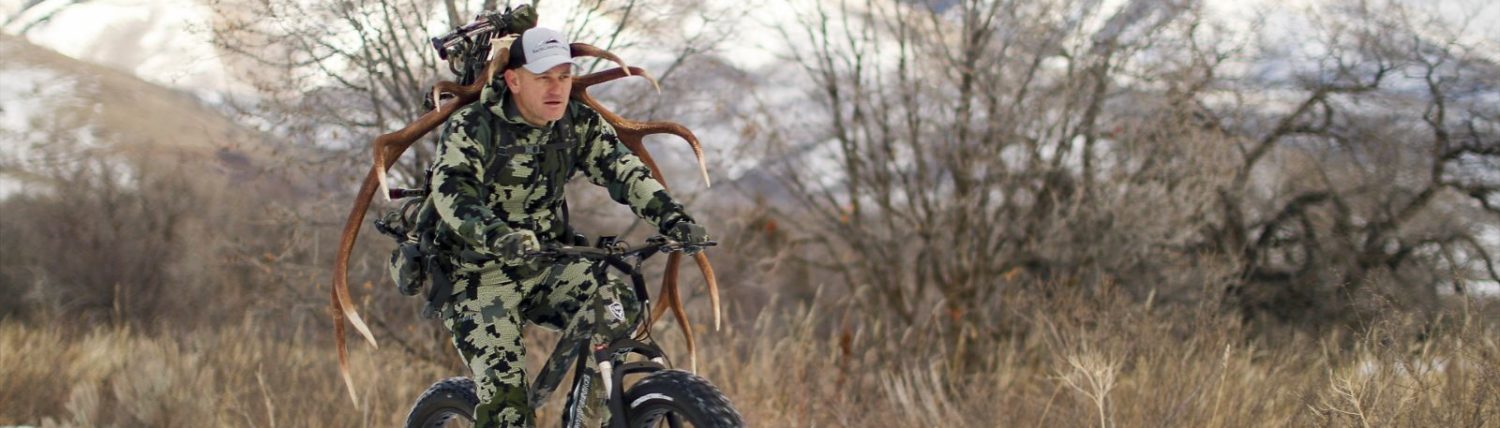
This is where things get real. I didn’t buy a tow-behind game trailer until my second season, and I regret waiting. That first November, I shot a decent 8-point about a mile and a half from my truck. I quartered him and tried to strap everything onto the rear rack. What a circus. The bike was squirrely, blood got everywhere, and I had to make two trips anyway.
A proper game trailer solves all of that. Look for one with pneumatic tires (not hard plastic wheels), a fat-tire-compatible hitch, and at least 100-pound capacity. They run $200 to $500. eBike Generation carries several that pair well with Bakcou, Rambo, and Himiway bikes. Some fold flat for storage, which matters if your garage looks like mine. If your bike doesn’t have a built-in hitch point, pick up a hitch adapter that clamps to the rear axle or seat post. Twenty to forty dollars.
Bags Worth Buying (and One I Regret)
Let me save you some money. I bought a cheap set of panniers off Amazon for about $22. Looked great in the photos. First real ride, one of the mounting hooks snapped off when I hit a root, and the whole bag went into my rear wheel. Ripped the bag, jammed up the spokes, and I walked the last half mile out in the dark. Get a real set with solid hardware. Waterproof is non-negotiable. Expect to pay $50 to $100 for something that’ll hold up. I like having separate compartments so clean clothes stay away from the muddy, bloody stuff.
Two other bags that earn their keep: a frame bag that fits inside the triangle of your frame (great for a first aid kit, multi-tool, and snacks) and a small handlebar bag for things you need without stopping. Phone, calls, a granola bar. If you can find one with a clear top panel, you can run your phone as a GPS display without fishing it out. Those two bags together run maybe $50.
Don’t skip the saddle bag. I know it’s boring. It sits under your seat and holds your tire repair stuff and maybe a multi-tool. You’ll forget it exists until the day you get a flat at dusk two miles from the truck. Then you’ll be really glad it’s there.
Let’s Talk About Lights
Stock headlights on most hunting eBikes are garbage. I’ll just say it. They’re fine for being seen on a road, but for navigating a two-track through the woods at 5 AM? Not even close. I found this out the hard way my first season when I rode into a washout I couldn’t see until I was already in it. Bent my front rim and had to limp back to the truck. Could have been avoided with a real light.
Upgrade to something with at least 1,000 lumens. USB rechargeable. Make sure the mount fits fat-tire handlebars because they’re often oversized compared to road bikes. I run a light I picked up for about $55 and it’s been flawless for two seasons. One thing worth mentioning: some of the super-bright lights have multiple modes, and you’ll want to use the lower settings once you get close to your hunting area so you’re not lighting up the whole timber and pushing deer out ahead of you.
A tail light is cheap life insurance if you ride near any roads. Ten, maybe fifteen bucks. Get one with a flash mode. Not much else to say about it.
For those of you chasing hogs or coyotes at night, red and green filter lights are something you should look into. Red preserves your night vision, which matters more than most people realize when you’re trying to navigate in the dark without alerting everything in the area. Green is the go-to for hog hunting because it lights up eyes at distance without blowing animals out of the area the way a white beam does. I’ve seen clip-on and handlebar-mounted versions with switchable filters for $15 to $40. A buddy of mine runs green lights on his Bakcou for hog hunts in Texas and swears by them. Says the hogs don’t react to it at all. Useful stuff if night hunting is part of your program.
Navigation, Electronics, and Keeping Things Charged
Three items here, and they all work together. A phone mount, a way to charge it, and for backcountry hunts, a standalone GPS.
On the phone mount: don’t cheap out. I’m serious. My buddy Jerry bought a $7 mount and his phone bounced off the handlebars into a creek crossing on the second ride. Phone was toast. That’s a $1,000 lesson to save $15 on a mount. Spend $20 to $30 on something with an actual locking mechanism and vibration dampening. Your phone is your map, your weather, your camera, and your connection to the outside world. Treat it that way. I’ve been using a Ram mount for three seasons now and it hasn’t budged.
If you hunt public land out west or anywhere cell service gets spotty, a dedicated Garmin handheld is worth the investment. I mark every stand location, every trail camera, every place I’ve found sign. The base models do everything most of us need. Prices range all over the place.
Cold weather kills phone batteries. You already know this if you’ve ever tried to text with frozen fingers in a December stand. A USB power bank mounted on your frame keeps your devices topped off all day. If your eBike has a built-in USB port that runs off the main battery, even better, but most don’t. A power bank and frame mount together cost maybe $30.
Battery Life and the Spare Battery Debate
I’ll keep this simple. A spare battery doubles your range. Period. If you’re doing day hunts within a few miles of the truck, you probably don’t need one. If you’re running all-day sits or multi-day camping trips, you absolutely do. They’re expensive, no way around it. Three to six hundred dollars depending on the brand and capacity. But running out of power deep in the backcountry is a long, heavy walk home. These bikes weigh 60 to 75 pounds. You do not want to pedal one with a dead battery uphill for three miles. Trust me on that. eBike Generation carries spares for Himiway, Bakcou, Rambo, and other popular models, and they can make sure you get the right voltage and connector for your specific bike.
Also, always bring your charger on overnight trips. Keep it in a dry bag. If you have access to a generator or vehicle inverter at camp, you can top off overnight and start fresh. A backup charger isn’t a bad idea if you can swing it. Replacement chargers run about $50 to $80.
Tires, Flats, and the Thorn Problem
You will get a flat. I don’t mean you might. You will. Especially if you hunt anywhere with hedge, locust, or goatheads. The thorns on Osage orange are no joke, and they’ll punch right through a standard tube like it’s not even there. Pack a tire repair kit in that saddle bag I mentioned earlier. Tire levers, patches, a CO2 inflator or mini pump, and a spare tube. Make sure the tube is fat-tire sized. Standard road bike tubes won’t help you out here. The whole kit runs $25 to $40 and takes up almost no space.
Better yet, run tire sealant and prevent most flats before they happen. Slime or a similar product goes inside your tubes and plugs small punctures on the fly. About ten dollars, treats both tires, lasts the whole season. I started using it after my third flat in one October and haven’t had a puncture since. Should have done it from the start. If you’re really serious about flat prevention, look into upgrading to tubeless tires and running a proper tubeless sealant. It’s more involved to set up, but some of the guys I hunt with have gone that route and they ride through the nastiest thorn patches without a second thought.
Camo, Security, and a Few Final Thoughts
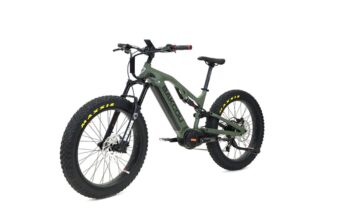
Most hunting eBikes come in matte black or OD green, which is fine. But if yours is bright blue or silver, a camo vinyl wrap fixes that fast. Mossy Oak, Realtree, whatever pattern matches your terrain. It protects the paint too. I’ve seen kits for $30 to $80. Some guys just hit it with rattle-can camo spray paint, which honestly works great if you’re not planning to resell the bike. I may have done this to my first Himiway. No regrets.
Finally, let’s talk about security. Your hunting eBike probably cost you $1,500 or more. Maybe a lot more. Don’t leave it unlocked at a trailhead and hope for the best. A heavy cable lock or U-lock looped through the frame and both wheels, secured to a tree or your truck rack, is basic common sense. Get one long enough to actually reach around everything. A decent lock costs $20 to $50. I also dropped an AirTag inside my frame tube as an extra layer. Cost me about $25 and gives me a little peace of mind when I’m on public land and the bike’s sitting at the trailhead for six hours. A guy in my hunting group had his bike stolen off a truck rack at a gas station last fall. He didn’t have a tracker. Never got it back.
Where I’d Start
If I had to set up a brand new hunting eBike tomorrow with a limited budget, here’s what I’d grab first: a gun mount (or bow holder), a rear rack if the bike doesn’t have one, a milk crate, a set of bungees, a real headlight, and a tire repair kit with sealant. That covers you for 90% of hunts. Everything else can come later as your needs and budget grow.
A couple of things I learned the hard way that might save you trouble. Test your entire setup on a shakedown ride before the season. Ride some rough ground. Hit some bumps. See what rattles. Anything that makes noise will spook deer, guaranteed. I once had a rack bolt work itself loose and my whole cargo setup was clanking like a cowbell for the last quarter mile to my stand. Didn’t see a deer that morning. Big surprise. Use foam tape, rubber washers, or even electrical tape anywhere metal touches metal. Watch your total weight, because every pound of accessories cuts into your battery range. I try to keep my total added weight under 30 pounds of accessories and it still knocks about 10% off my range compared to riding bare. And buy quality on the stuff that holds your gun and hauls your game. Cheap hardware fails at the worst possible time, and I promise it’ll be opening morning when it does.
For accessories, spare batteries, and complete hunting eBike setups, check out eBike Generation. They carry gear for Bakcou, Rambo, Himiway, and most of the popular hunting eBike brands.